Antique leather chairs boast timeless beauty and sophistication. But, over time they can accumulate dirt and grime, ruining their original shine. Cleaning an antique leather chair requires a gentle touch to preserve its distinctive character and lengthen its life. Here, let’s explore how to clean your beloved antique leather chair and restore its former glory.
Gather the supplies you’ll need. You’ll need a soft cloth or sponge, mild soap made for leather, distilled water, and leather conditioner. Avoid harsh chemicals or abrasive materials that could harm the leather’s delicate surface.
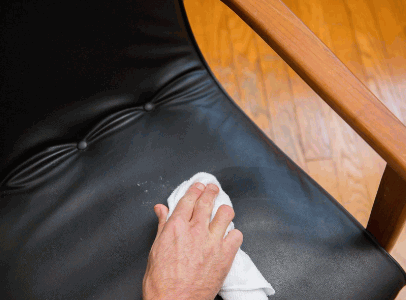
Test the cleaning solution on a small, hidden area to ensure it won’t cause discoloration or harm. Confirm that it’s safe to use, then dampen the soft cloth or sponge with distilled water and carefully wipe down the entire chair. This removes dust and loose dirt without damaging the leather.
Mix mild soap and distilled water in a bowl. Dip a clean cloth or sponge in this solution and wring out the excess liquid. Using circular motions, gently wipe down the chair to remove dirt and stains. Be careful not to apply too much force, as this could harm the leather.
Once you’ve finished cleaning the chair, it’s essential to moisturize and protect the leather from drying out or cracking. Layer a small amount of high-quality leather conditioner onto a clean cloth and rub evenly all over the chair. This conditioning treatment helps replenish lost moisture and restores flexibility to the leather fibers.
Understanding The Antique Leather Chair
The antique leather chair is an object with historical significance that requires understanding. It is important to comprehend the unique characteristics of this chair, such as its age, style, and craftsmanship. By appreciating these attributes, one can fully comprehend the value and significance of the antique leather chair.
It is crucial to handle this item with care and to clean it using appropriate methods to preserve its originality. Taking into consideration factors like the type of leather, the presence of any damage or stains, and the overall condition of the chair, one can effectively clean and maintain its beauty. Additionally, using suitable cleaning products and techniques can enhance the longevity of the leather chair, preventing damage and deterioration.
With proper understanding and care, one can enjoy the elegance and charm of an antique leather chair for years to come.
From sleek Victorian armchairs to rustic farmhouse stools, antique leather chairs have more history than your ex.
Types Of Antique Leather Chairs
Various types of antique leather chairs boast the craftsmanship of different eras. Each has its own design with unique features that make it valuable to antique collections. Check out this table for popular types:
| Type | Description |
|---|---|
| Chesterfield | Deep button-tufted upholstery and rolled arms. Originated in the 18th century. Classic for traditional interiors. |
| Club | Also known as the armchair. Designed for exclusive gentleman’s clubs in the 19th century. Plush cushions, low backrests, wide armrests. Maximum comfort. |
| Chippendale | Named after Thomas Chippendale. Intricate wood carvings with sumptuous leather upholstery. Popular during the Georgian period. Highly sought after. |
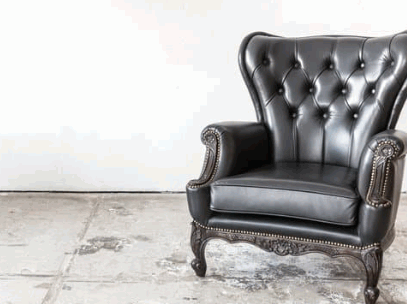
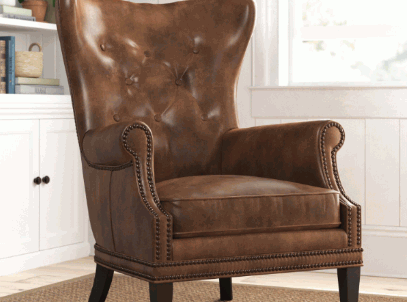
| Wingback | Tall backs with “wings” on either side. Designed to shield occupants from drafts. Distinctive silhouette with fine leather upholstery. |
Other nuances worth noting about antique leather chairs include unique ornamentation or embellishments, such as brass stud detailing or carved wooden legs. These intricacies show the craftsmanship and attention to detail.
Antique leather chairs continue to captivate collectors and enthusiasts. They are functional pieces of furniture and a window into the past. Whether it’s the timeless elegance of a Chesterfield or the regal charm of a Chippendale, these chairs are reminders of artistry and legacy that endure through generations.
Identifying The Condition Of The Chair
To accurately assess the value of an antique leather chair, it’s essential to identify its condition. Inspecting the quality of the leather, frame stability, and overall appearance can give you insight into its history.
When evaluating an antique leather chair, consider the following:
| Factor | Description |
|---|---|
| Leather Quality | Check for wear, cracks, fading, softness, suppleness, or brittleness. |
| Frame Stability | Look for signs of damage or weakness. Make sure all joints are secure. |
| Upholstery | Check for tears, stains, or loose threads. See if it needs reupholstering or repair work. |
| Patina | Look for a natural sheen on the surface caused by age and use. The desirable patina adds character. |
Also, observe other unique details that can tell you about the chair’s history. These may include manufacturer’s stamps, special design elements from a certain era, or luxurious materials like velvet or silk from the Victorian era.
Knowing these historical aspects helps you appraise the antique leather chair more effectively.
Preparing For Cleaning
- Assess: Inspect the antique leather chair for any damages, stains, or discoloration. Take note of specific areas that require extra care.
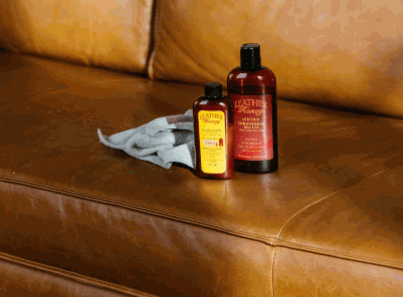
- Gather Supplies: Collect all the necessary cleaning materials, such as a mild leather cleaner, soft microfiber cloths, a soft-bristle brush, and a leather conditioner.
- Test Spot: Before proceeding with the overall cleaning, conduct a spot test on a small inconspicuous area of the chair. This ensures that the cleaner and conditioner will not cause any harm or discoloration to the leather.
- Dusting: Begin the cleaning process by dusting off any loose dirt or debris from the chair’s surface using a soft, dry cloth or a soft-bristle brush. Pay close attention to crevices and hard-to-reach areas.
- Cleaning: Dampen a soft microfiber cloth with a small amount of the mild leather cleaner. Gently wipe the entire chair, using circular motions to lift any embedded dirt or stains. Avoid excessively wetting the leather.
- Conditioning: Apply a high-quality leather conditioner to a clean, dry cloth. Rub it onto the leather surface using circular motions, focusing on areas prone to drying or cracking. Allow the conditioner to be absorbed for the recommended time before wiping off any excess.
- Drying: Leave the chair to air dry naturally. Avoid using artificial heat sources, as they can cause the leather to shrink or crack.
- Protecting: Finally, to keep the chair in good condition, consider using a leather protectant spray after cleaning. This will help guard against future stains and maintain the leather’s luster.
An Essential Tip:
Regularly dusting and conditioning your antique leather chair will help preserve its longevity and prevent deterioration over time.
Gather your tools and materials like a crime scene investigator, because cleaning an antique leather chair is a delicate operation that requires precision and a touch of forensic expertise.
Gathering Necessary Tools And Materials
Gathering tools and materials is essential for a successful cleaning process. Here’s a 3-step guide to help you stay organized and make sure you have everything you need:
| 1. Make a list. Jot down what you’ll need, like cleaning solutions, microfiber cloths, scrub brushes, gloves, and a vacuum cleaner. |
| 2. Check your inventory. Before buying anything new, look at what you already have. Tick off the items on your list that are available in your inventory. |
| 3. Shop smartly. When shopping, keep quality and affordability in mind. Look for deals and eco-friendly alternatives. |
Remember to get any special tools or materials you need, such as carpet cleaners or window washing equipment, too.
Gather everything before diving into your cleaning routine. This way, you can save time and effort and get spotless results! Don’t forget this important step – your future self will thank you!
Setting Up A Suitable Workspace
Clear the area – get rid of anything that could block you or stop you from getting to your cleaning tools.
Put your supplies nearby – arrange them where they’re easy to find.
Lighting is key – use natural or artificial light to make sure you can see what you’re doing.
Ergonomic furniture is a must – use chairs and desks that help keep your posture good and reduce back strain.
Block out distractions – use earplugs or calming music to help you stay on track.
Find a quiet spot – if you can, work in a space away from busy areas and noise.
Add your own touches – motivational quotes or plants can help boost your mood and productivity.
By taking these steps, you’ll create a workspace that encourages focus and helps you do your best work.
Check out: How To Clean White Bonded Leather Furniture
Cleaning Process
The process of cleaning an antique leather chair involves several steps to ensure its preservation and restoration. Here’s a guide to successfully cleaning your antique leather chair:
- Inspect the chair: Start by examining the chair for any damage, such as cracks, tears, or loose stitching. Address these issues before proceeding with the cleaning process.
- Prepare the cleaning solution: Mix a mild soap or leather cleaner with water in a bucket. Avoid using harsh chemicals or excessive water, as they can damage the leather.
- Test the solution: Before applying the cleaning solution to the entire chair, test it on a small, inconspicuous area. This will help ensure that the solution doesn’t cause any discoloration or damage to the leather.
- Clean the chair: Dip a soft cloth or sponge into the cleaning solution and gently wipe down the entire surface of the chair. Pay special attention to any stained or soiled areas, using a circular motion to lift dirt and grime.
- Remove excess moisture: After cleaning, use a clean and dry cloth to remove any excess moisture from the chair. Allow it to air dry naturally, away from direct heat and sunlight.
In addition to these steps, it’s important to avoid placing the leather chair near heating vents or in direct sunlight, as this can cause the leather to dry out and crack. Regularly dusting and conditioning the chair can also help maintain its beauty and longevity.
Don’t be surprised if you find a family of dust bunnies throwing a reunion party on your antique leather chair – time to crash it and show them who’s boss!
Dusting And Removing Loose Dirt
- Gather the right tools! Microfiber cloth, feather duster, vacuum with a brush attachment, mop, or broom.
- Start off by dusting from top to bottom, shelves and furniture. Get to corners and hard-to-reach spots.
- Vacuum carpets, rugs, and upholstery. Move slowly for thorough cleaning.
- Wipe down high-traffic areas and frequently touched surfaces with disinfectant wipes or a damp cloth soaked in a cleaning solution.
- Finally, sweep or mop hard floors with the right cleaner. Tile, hardwood, or laminate?
For even better results:
- Dust regularly! Microfiber cloths are better than cotton rags.
- Vacuuming removes dirt and allergens like pet hair and dander.
- Disinfect touched surfaces to keep germs away.
- Sweep or mop floors for a clean look and no dirt left behind.
Follow these steps and suggestions to create a cleaner, healthier environment. Embrace the art of dusting and loose dirt removal!
Testing Cleaning Products On A Small Area
Testing cleaning products on a small area first is essential to determining their effectiveness. This lets you identify any potential negative effects before using the product on a larger scale. Here’s a 5-step guide for testing:
- Choose the area: Pick a hidden, easily accessible spot that represents the surface.
- Prepare the surface: Clean it with mild soap and water or any appropriate pre-cleaning method. Ensure there are no stains or residues.
- Apply the product: Follow instructions and use a clean cloth or sponge to spread it across the surface.
- Observe and wait: Let the product sit for the recommended amount of time. Note any reactions like discoloration or fading.
- Evaluate and proceed: After sufficient time has passed, assess the outcome. If there are no adverse effects, you can proceed with the product. If there are, choose an alternative or seek professional advice.
Keep these suggestions in mind when testing: start with mild products, test different surfaces, and document your findings. This way, you can test products safely and get the best results.
Cleaning The Leather Surface
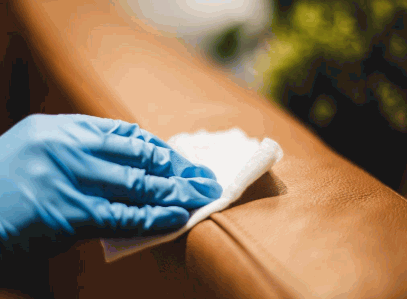
Gently brush or wipe off any dirt from the leather. This will stop it from damaging the leather when you clean it.
Take a cloth and wet it with water and mild soap for leather. Don’t use tough chemicals, as they can take away the oils and harm the leather. Wipe the cloth over the leather, on areas that have dirt or marks. Don’t rub or scrub too much, as it can make the leather change color or ruin the texture.
Then, use a different cloth with water to take off any soap from the leather. Be sure to rinse it all off, so nothing gets stuck and attracts dirt.
Let the leather dry naturally in a place without sun or heat. Don’t use hairdryers or heaters as they can make it shrink, crack, or warp.
After cleaning, apply a conditioner designed for leather. This will give it moisture and keep it shiny and soft.
Check the manufacturer’s instructions for your leather’s care needs.
By doing these steps and understanding your leather’s needs, you can keep it clean and in good condition for years.
Treating Stains And Spots
- Identify the stain first. What type is it? Common ones are food, oil, ink, and drinks.
- Pre-treat the area. Blot with a cloth or use a remover- read the instructions!
- Clean thoroughly. Find a detergent that’s safe for the surface. Scrub gently in circles. Rinse.
- For tough stains, like red wine or coffee, refer to special guidelines.
- Act quickly when tackling stains. They become tougher to remove when left alone.
Conditioning And Preserving The Leather
To condition and preserve an antique leather chair, follow these six steps:
- Clean the leather surface using a mixture of mild soap and warm water. Gently scrub the surface with a soft cloth or sponge.
- Rinse the soap residue with a clean, damp cloth and pat dry with a towel.
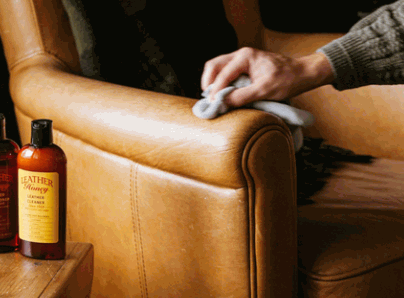
- Apply a leather conditioner to the chair using a soft cloth. Work the conditioner into the leather in small circular motions.
- Let the conditioner sit on the leather for the recommended time mentioned on the product packaging.
- Buff the leather chair with a clean cloth to remove any excess conditioner and restore shine.
- Repeat this process every few months to keep the antique leather chair in optimal condition.
It’s important to note that antique leather chairs may have unique characteristics and require specific care. Consulting with a professional or researching specific guidelines for the particular type of leather is recommended.
A true fact about antique leather chairs is that they have been used for centuries and hold historical significance. Smithsonian.com reports that ancient leather furniture can be found in archaeological sites dating back to the Egyptian civilization.
Give your antique leather chair some TLC with a leather conditioner, because just like a good pick-up line, it’ll make it feel smooth and irresistible.
Applying Leather Conditioner
- Start by cleaning the leather with a mild soap or cleaner.
- Wipe away any dirt or stains with a soft cloth.
- Don’t apply the conditioner directly to the leather, pour a small amount onto a lint-free cloth.
- Rub in the conditioner in a circular motion, covering the whole surface.
- Let the conditioner absorb for a few minutes and don’t leave it on too long as it could discolor.
- Use a clean cloth to buff off excess conditioner.
Different leathers need different conditioners and techniques, so read the manufacturer’s instructions before you start. Regularly conditioning your leather items can help them last longer and look better. This includes avoiding cracking, fading, and other damage.
Pro Tip: For best results, condition your leather items every 3 months or follow experts’ advice.
Buffing And Shining The Leather
- Clean the Leather: Use a soft cloth or brush to remove dirt and debris.
- Apply Leather Conditioner: Use a clean cloth to apply a small amount of conditioner. Rub in circular motions.
- Buff with a Soft Cloth: Use a soft cloth to buff the leather in circular motions.
- Apply Leather Polish: Select a suitable polish and use a clean cloth to apply a thin layer. Buff in circular motions for a glossy shine.
- Let it Dry: Let the polish dry before using or handling the leather item.
- Optional Finishing Touches: Enhance the leather with a finishing spray or wax product. Test on an inconspicuous area first.
- Varying Techniques: Techniques may vary depending on individual preferences and leather types.
- Timeless Appeal: Throughout history, artisans used natural substances to preserve and restore leather. Beeswax is an example. This practice demonstrates the timeless appeal of leather craftsmanship.
Final Thoughts And Recommendations For Ongoing Maintenance
Care for your antique leather chair with a few considerations. Regular maintenance is essential – keep it clean and dust-free. Use a gentle leather cleaner regularly and follow up with a conditioner. To save its beauty, put it away from sunshine and heat. Look for signs of wear and address them quickly. Add a protective cover when not in use. Use a leather protector spray for an extra layer of protection against spills and stains. Create a schedule for cleaning and conditioning. Stay consistent to enjoy its beauty for years. Give it the care it deserves and preserve its timeless elegance for future generations.
Conclusion
Farewell to Dirt and Grime!
Cleaning your antique leather chair is a labor of love. You now know how to keep it beautiful. Handle it with care. No harsh chemicals or brushes – use gentle cleaning agents and soft cloths. Condition the leather regularly. This nourishes it and adds luster. Please protect it from the sun and heat. Curtains or blinds are good shields. If you can’t remove a stain, contact a professional. Farewell to dirt and grime – welcome back the timeless beauty of your antique leather chair!